
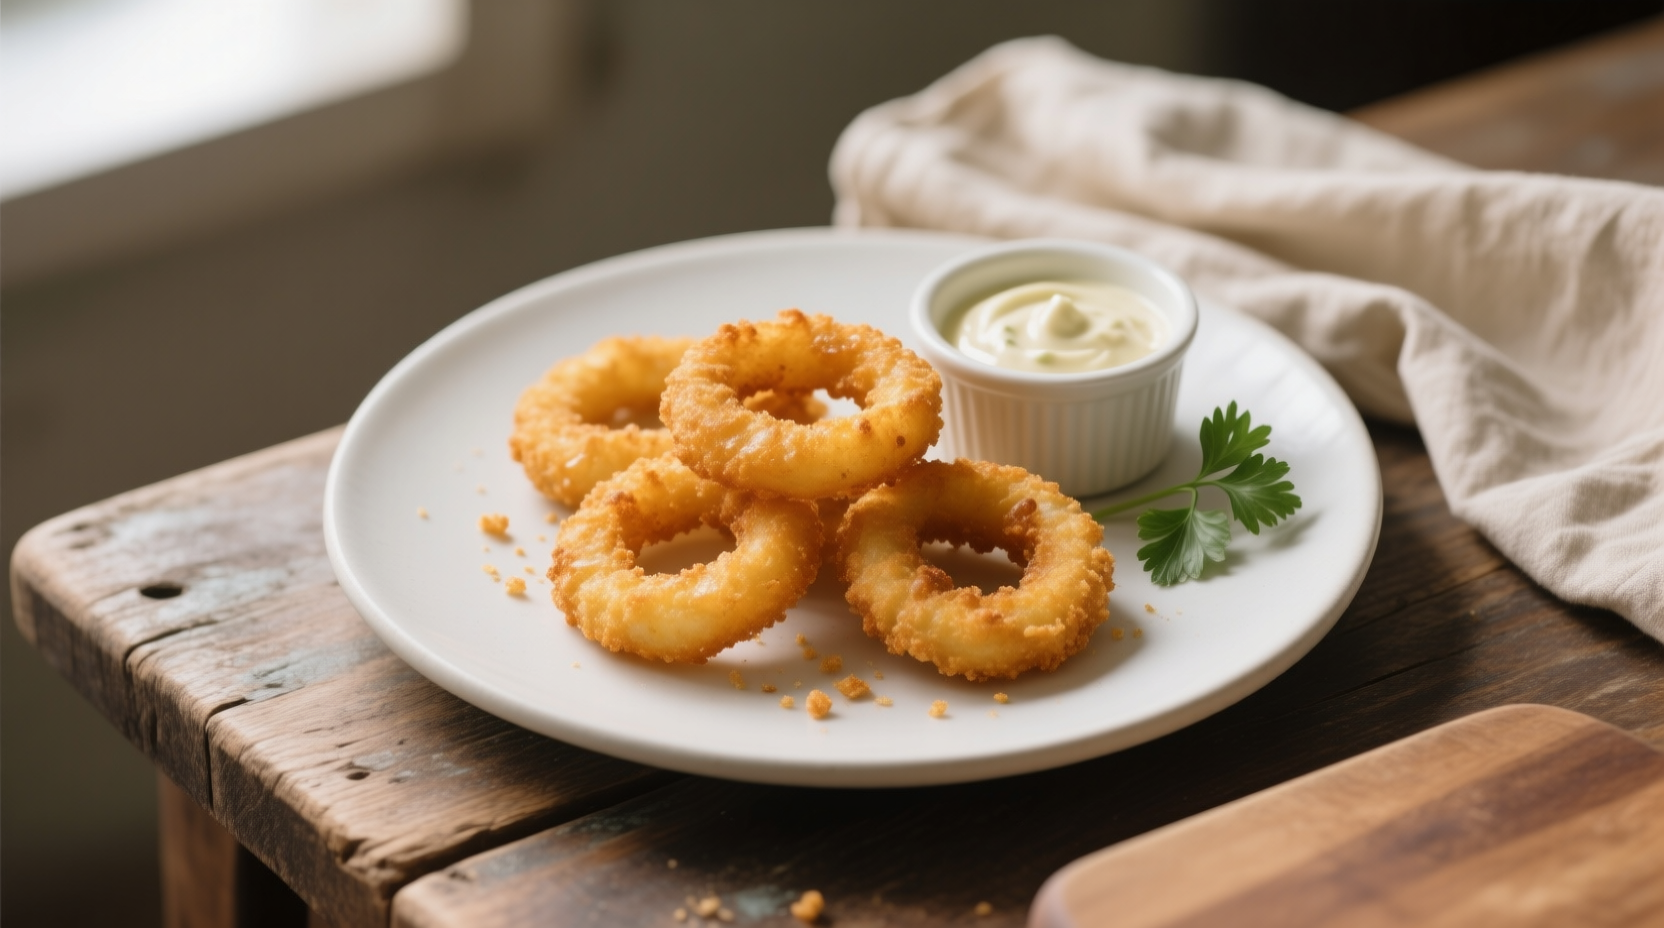
There’s something unfairly addictive about onion rings done right. That golden coat cracking under your teeth, the soft, sweet onion inside—if you’ve had a bad one, you’ll never forget it; but a good one? That lives rent-free in your head forever. The truth is, you don’t need a vat of hot oil to get that kind of perfection. With a few technical tweaks and an understanding of why things crisp, you can bake them, keep the crunch, and skip the greasy after-smell that lingers in your curtains for two days.
The purpose here is simple. I’ll walk you through a professional-level baked onion ring recipe that keeps things ridiculously approachable while still diving into the science that makes them work. Whether you’re a home cook who likes experimenting or a chef who wants to tweak for a healthier menu, you’ll find practical, no-fluff advice that works in a real kitchen, not just in a food stylist’s studio.
Why Baked Onion Rings Often Fail (And How We’ll Avoid That)
If you’ve ever tried baking onion rings and ended up with pale, limp loops, you’re not alone. The common mistake is treating baked recipes like deep-fried ones without adjusting for moisture loss, batter adhesion, and surface texture. In a fryer, oil instantly gelatinizes starches and dehydrates the outer layer. In the oven, that heat transfer is slower. Translation: you get steam trapped inside your coating, which kills the crisp.
The solution? Threefold. First, choose the right onion variety—sweet onions like Vidalia, Walla Walla, or Maui have lower sulfur and higher sugar content, giving a more pleasant caramelized bite. Second, nail the coating system: a dry-wet-dry method that grips like a vice. Third, manipulate your oven environment to mimic the dehydration of frying—high, direct heat and enough air circulation to pull moisture out fast.
Ingredient Selection – The Backbone of the Crunch
You can’t build crunch on poor ingredients. Your flour choice, breadcrumb style, and even the milk you use will change texture. Professional kitchens often use panko instead of fine breadcrumbs because its irregular shape increases surface area for browning. That’s pure physics—more edges mean more Maillard reaction spots.
For the flour, an all-purpose base is fine, but you can add a small percentage of cornstarch or rice flour to boost that brittle crunch. Why rice flour? Its lower protein content means less gluten, which translates to a lighter, shatter-prone crust. And if you’re wondering about seasoning, skip the “I’ll season after baking” approach. Season every layer—flour, egg wash, breadcrumbs—because that seasoning not only flavors the ring, it slightly alters the moisture interaction during baking.

Step-by-Step – Professional Method for Baked Onion Rings
1. Preheat for Power
Set your oven to 450°F (232°C). Yes, it’s aggressive, but the high heat is critical. Preheating your baking sheet inside the oven helps start browning the moment the rings hit the surface.
2. Slice for Balance
Peel your onions and cut into ½-inch rings. Thicker rings look great but can throw off the coating-to-onion ratio. A half-inch gives enough bite without feeling like you’re chewing raw onion in disguise.
3. Layer the Coating
- Dry 1: Mix 1 cup all-purpose flour, 2 tablespoons cornstarch, 1 teaspoon smoked paprika, ½ teaspoon garlic powder, ½ teaspoon salt, and a pinch of black pepper.
- Wet: Whisk 2 large eggs with 2 tablespoons milk until smooth.
- Dry 2: Combine 1½ cups panko breadcrumbs with 2 tablespoons finely grated Parmesan (optional for depth) and a touch of salt.
4. The Dip Dance
Work one ring at a time. Flour first (press gently so it sticks), then into the egg wash (let excess drip), then into the breadcrumb mix (pressing again). Don’t rush—crumb adhesion now saves heartbreak later.
5. Oil and Air
Lightly mist each coated ring with cooking spray or brush with a thin layer of oil. This step is non-negotiable—dry crumbs alone won’t brown evenly in the oven. Arrange on the hot baking sheet in a single layer. Leave space between rings for airflow.
6. Bake Hard, Flip Once
Bake for 8–10 minutes, flip with tongs, and bake another 6–8 minutes. Look for golden edges and that distinct hollow sound when you tap the crust.
Science Behind the Crisp
Crispness isn’t just about dryness—it’s about structure. The coating has to be rigid enough to resist steam pressure from the cooking onion. That’s why cornstarch and panko work so well; they form a glassy shell that doesn’t collapse when moisture inside the onion expands.
Professional chefs sometimes preheat the coated rings for 5 minutes before baking—just enough to dry the outer surface slightly. This micro-dehydration step can mean the difference between crisp and cardboard.
Also, remember that onions contain natural sugars. These caramelize at lower temperatures than starch browning, so part of that golden color you’re seeing is sugar reacting, not just breadcrumbs cooking.
Common Mistakes to Avoid
- Overcrowding the pan – steam trapped between rings will soften the crust. Use two pans if needed.
- Skipping the oil mist – baked crumbs without fat turn dry, not crispy. There’s a difference.
- Coating too thick – you’ll get an undercooked, gummy layer inside. Thin and even wins.
- Using cold onions – chill makes the batter seize, leading to patchy coverage. Room temp onions coat better.
Making Them Work for Menus
In a professional kitchen, you want repeatable results. Pre-coating onion rings and freezing them on a sheet tray before service is not only possible—it can improve adhesion. When baked from frozen at the same high temperature, they come out nearly identical to fresh. The trick is to freeze them uncovered until solid, then store in airtight containers to avoid ice crystals.
Restaurants aiming for gluten-free menus can sub rice flour for all flour steps and use gluten-free panko. A small touch of xanthan gum in the egg wash can improve binding for gluten-free coatings.

Flavor Variations That Sell
The base recipe is solid, but you can flavor shift it in ways that make sense for your audience. For a southern-style twist, swap smoked paprika for cayenne and add cornmeal to the breadcrumb mix. For an Asian-inspired menu, mix in sesame seeds and a dusting of wasabi powder to the dry coating. And yes, you can turn them into a dessert item—thin rings, dredged in cinnamon sugar right out of the oven, served with a vanilla cream dip. It sounds mad, but it sells.
Serving and Holding Without Losing Crunch
One of the hardest parts is keeping baked onion rings crisp for service. If you pile them in a bowl, steam buildup will ruin them. Instead, hold them on a wire rack in a warm oven (around 200°F) with the door slightly ajar. This allows moisture to escape while keeping them hot enough for plating.
For home cooks, that wire rack trick works too. Just don’t cover them in foil—ever.
Nutrition and Marketability
Here’s where baked onion rings get their advantage. Without the oil bath, they absorb far less fat—about 4–5g per serving compared to 15–20g for fried versions. That’s not just a talking point for health-conscious customers—it’s a menu differentiator. According to a 2024 survey from the National Restaurant Association, 39% of diners actively seek lighter versions of comfort foods. This recipe checks that box without sacrificing texture.
Final Expert Tips
- Let the coated rings rest 5 minutes before baking for better adhesion.
- Use convection mode if your oven has it—airflow is king for crispiness.
- For even deeper crunch, toast the panko briefly in a skillet before coating.
Wrapping It Up
Crispy baked onion rings aren’t just possible—they can be better than fried in the right context. They’re lighter, cleaner to make, and more adaptable to flavor profiles. The secret is to treat baking like its own craft, not a poor imitation of frying. Respect the science, layer your flavors, and control your moisture, and you’ll end up with onion rings that shatter under your teeth in the best way.
If you’re cooking at home, this is the kind of recipe you’ll pull out for game nights and family dinners. If you’re a chef, it’s one more reliable, cost-effective side that pleases both health-conscious diners and those who just came for the crunch.
FAQs
How do you keep baked onion rings crispy?
Bake at high heat, avoid overcrowding, and hold them on a wire rack instead of stacking.
Can I make onion rings ahead of time?
Yes, coat and freeze them on a tray, then bake from frozen for the same crisp.
Which onions work best for baked onion rings?
Sweet onions like Vidalia, Walla Walla, or Maui give the best flavor and texture.
Why use panko instead of regular breadcrumbs?
Panko’s larger, airy crumbs brown better and create a crunchier texture.
Do baked onion rings taste like fried ones?
They’re lighter but still crisp and flavorful when done with proper technique.
Can I make them gluten-free?
Yes, use rice flour and gluten-free panko, with a touch of xanthan gum for binding.
How thick should I cut the onion rings?
About ½ inch thick gives the ideal coating-to-onion ratio.
Why mist the rings with oil before baking?
Oil helps crumbs brown evenly and improves crispness in the oven.
How long do baked onion rings stay crispy?
They’re best eaten immediately but can hold in a warm oven for up to 20 minutes.
Can I add extra flavors to the coating?
Absolutely, you can mix in spices, seeds, or cheese for unique variations.

Mariana is a passionate home cook who creates delicious, easy-to-follow recipes for busy people. From energizing breakfasts to satisfying dinners and indulgent desserts, her dishes are designed to fuel both your body and hustle.
When she’s not in the kitchen, she’s exploring new flavors and dreaming up her next recipe to share with the Foodie Hustle community.