
Bread isn’t just bread. It’s memory, it’s patience, and it’s the quiet rhythm of hands working dough until it feels alive. For beginners, making bread can look intimidating, but truth be told, it’s one of the most forgiving foods you’ll ever attempt. Once you understand the science and respect the process, you’ll wonder why you didn’t start baking sooner. Today, we’re diving into the 7 clear steps that lead you to a perfect loaf—soft, crusty, and impossibly fresh.
Why Bread Baking Scares Beginners
Most folks think bread belongs in the domain of seasoned bakers with flour-dusted aprons and stone ovens. That’s a myth. Bread has been baked for over 30,000 years, long before precision scales or temperature-controlled ovens even existed. What mattered was flour, water, time, and a bit of intuition.
Here’s the real problem: impatience. Beginners often rush the rise, skip proper kneading, or drown their dough in flour. Bread demands attention, but not perfection. The yeast does most of the heavy lifting. You’re just guiding the process.
Step 1: Choosing the Right Flour
If you grab the wrong flour, you’ve already set yourself up for disappointment. Bread flour and all-purpose flour are not the same. Bread flour has higher protein, usually around 12–13%, which means stronger gluten development and better structure. All-purpose flour can work, yes, but the results are softer, sometimes even a bit flat.
Whole wheat flour adds nuttiness but can weigh down your loaf if you don’t mix it with white flour. A 50/50 mix is usually a safe bet. Interestingly, in a 2023 survey by King Arthur Baking, 68% of new bakers admitted they had no clue about flour protein levels when starting. That’s why their loaves collapsed like a sad balloon.
Step 2: Understanding Yeast
Yeast isn’t magic, though it feels like it. It’s a living organism. Feed it water and sugar, and it releases carbon dioxide, which gives bread its airy lift. Beginners often confuse active dry yeast with instant yeast. They’re similar, but instant yeast can be added directly to flour, while active dry usually needs proofing in warm water first.
Temperature is the game changer. Water that’s too hot? You kill the yeast. Too cold? The rise drags on like a Monday morning. Aim for water between 100–110°F. A cheap kitchen thermometer saves you from guesswork. And remember, yeast doesn’t like salt dumped on top of it directly—always mix it in with flour before adding salt.

Step 3: Mixing Ingredients
This is where chaos usually happens. Beginners dump flour, water, yeast, and salt together and stir half-heartedly. Bread dough needs mixing until it feels cohesive, a bit sticky but not clinging like glue. Sticky dough is not failed dough—it’s actually a good sign you’ve got hydration right.
Hydration is crucial. A basic beginner loaf works best at about 65% hydration, meaning 650 grams of water for every 1000 grams of flour. Higher hydration creates open crumb and bigger holes, but also trickier handling. If you’ve ever drooled over those big-hole sourdough slices on Instagram, that’s hydration showing off.
Step 4: Kneading the Dough
Kneading develops gluten—the protein strands that give bread chewiness and structure. You can knead by hand or in a stand mixer. By hand, it’s 8–10 minutes of push, fold, turn. Don’t treat it like punishment, though. Gentle persistence is better than aggressive slamming.
Here’s the mistake everyone makes: adding too much flour during kneading. The dough looks sticky, and panic sets in. More flour feels like the solution, but you’re only drying out your loaf. Instead, lightly flour your hands or use a dough scraper. Stickiness will fade as gluten develops.
The “windowpane test” is your friend. Stretch a small piece of dough. If it spreads thin enough to see light without tearing, you’re ready. If it rips easily, knead a little longer.
Step 5: Fermentation and First Rise
This is where patience earns its keep. The first rise, or bulk fermentation, is where yeast gets busy. Leave your dough covered in a lightly oiled bowl at room temperature. The golden rule: let it double in size. Not “let it rise for an hour.” Doubling might take 45 minutes or 2 hours, depending on your kitchen’s warmth.
Professional bakers often prefer slow fermentation—placing dough in the fridge overnight. Cold fermentation develops deeper flavors, almost nutty and complex. A 2019 baking study from the University of Minnesota found that long fermentation boosts digestibility by breaking down complex starches. So yes, patience literally makes your bread easier on the gut.
Step 6: Shaping the Dough
Now comes artistry. Shaping isn’t just about looks—it controls how your bread expands in the oven. Degas the dough gently (don’t punch it violently, despite what grandma might’ve said). Then shape it into a ball or loaf.
The trick is surface tension. Pull the dough’s surface tight as you shape, tucking edges underneath. This tension holds gas inside and creates that bakery-style rise in the oven. Sloppy shaping equals a flat, spread-out loaf.
For sandwich loaves, press dough into a rectangle, roll it tightly like a jelly roll, and pinch the seam closed. Place it seam-side down in your pan.
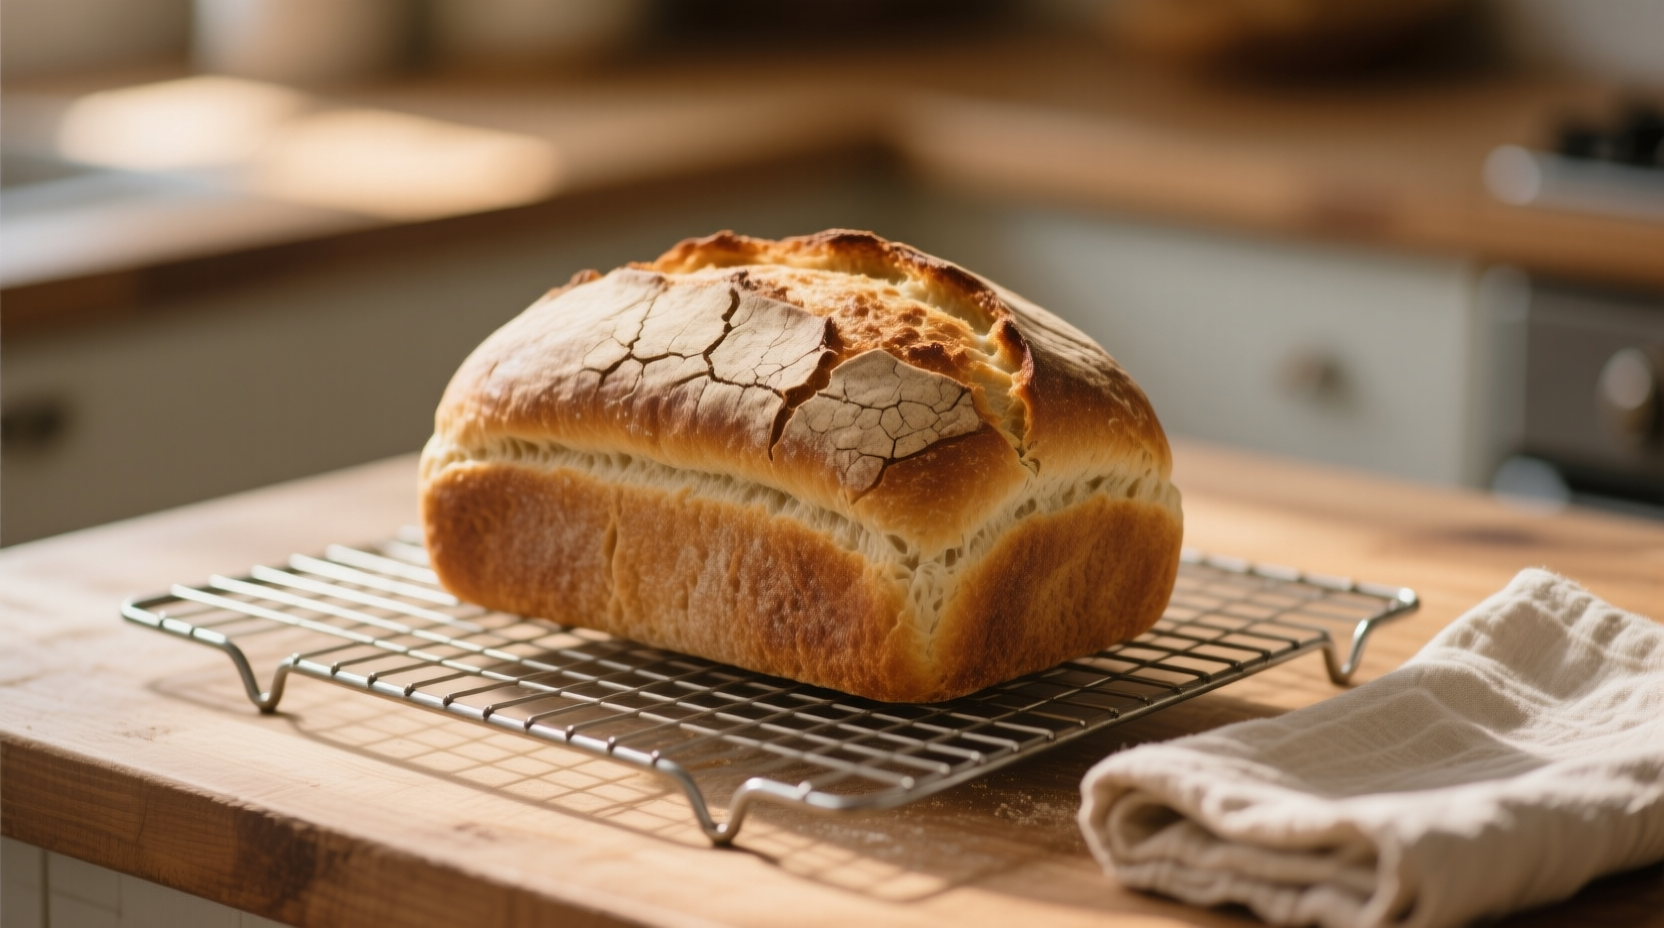
Step 7: Baking and Cooling
The oven is where bread magic meets science. Preheat to at least 450°F. A hot oven ensures “oven spring,” that dramatic first rise when dough hits heat. Professionals add steam to keep the crust thin and crisp. At home, you can place a pan of hot water at the oven’s bottom or spritz dough with water before baking.
Internal temperature tells you more than color. Bread is fully baked when it hits 190–200°F inside. Don’t trust just the crust—it lies. Dark crust doesn’t always mean done.
And please, resist cutting into hot bread right away. Cooling lets moisture redistribute. Slice too soon, and your loaf turns gummy. Waiting at least 30 minutes is torture, yes, but worth it.

Common Beginner Mistakes
Let’s be real: you’ll mess up a few loaves. Everyone does. The most common errors? Adding too much flour, rushing fermentation, killing yeast with hot water, and slicing too soon. Another one: forgetting salt. Bread without salt tastes like cardboard.
There’s also the “Instagram curse.” Beginners see perfect artisanal loaves online and assume theirs should look the same. Don’t chase aesthetics right away. Focus on flavor and texture. Beauty comes with practice.
The Science of Flavor
Good bread isn’t just about structure—it’s about taste. Flavor develops from fermentation, caramelization in the crust, and even the minerals in your water. Hard water can actually strengthen gluten, while soft water sometimes makes dough slack. Professional bakers often adjust their recipes depending on water chemistry.
Even simple white bread can taste extraordinary when fermented slowly. That’s why sourdough, with its wild yeast and bacteria, has dominated the baking trend in recent years. It’s flavor born from time, not shortcuts.
Why This Matters for Professionals
Even if you’re a chef or food pro, mastering bread gives you an edge. It’s one of the cheapest but most telling ways to showcase skill. A restaurant can serve stunning entrées, but if the bread basket is mediocre, the entire meal feels weaker.
In fact, a 2021 National Restaurant Association survey found that 74% of diners notice bread quality, even when it’s “free.” For professionals, bread is branding. For beginners, it’s empowerment.
Beyond the Basics
Once you’ve nailed the simple loaf, experimentation is endless. Add-ins like olives, nuts, or seeds change texture dramatically. Playing with hydration leads to ciabatta or focaccia. Adjust shaping, and you’ve got baguettes. Bread is both science and canvas.
The key lesson: don’t let fear stop you. Every loaf, even the lopsided ones, teaches you something new. And the smell of baking bread? Worth every flour-covered mistake.
Final Thoughts
Making bread at home isn’t about perfection. It’s about learning patience, understanding simple science, and trusting your hands. The 7 steps—flour choice, yeast handling, mixing, kneading, fermenting, shaping, and baking—aren’t complicated once you see how they fit together.
For beginners, it’s less about recipes and more about rhythm. Once you feel dough change under your palms, you’re no longer a recipe-follower—you’re a baker. And honestly, that first slice of warm bread you made yourself? It’s a kind of victory no store-bought loaf will ever touch.
FAQs
What is the best flour for beginner bread baking?
Bread flour is best because of its higher protein, but all-purpose flour works fine too.
How do I know if my dough has risen enough?
Wait until it has doubled in size, not just by the clock.
Can I skip kneading the dough?
You can use no-knead methods, but kneading builds stronger structure and texture.
How hot should the water be for yeast?
Between 100–110°F, warm but never too hot to touch.
Why does my bread taste bland?
You probably forgot salt or rushed the fermentation.
Can I bake bread without a stand mixer?
Yes, kneading by hand works perfectly, just takes more patience.
Why does my bread come out dense?
It’s usually from adding too much flour or under-proofing the dough.
Do I really need to wait before slicing bread?
Yes, cutting too soon makes it gummy, so wait at least 30 minutes.
What’s the easiest bread for beginners?
A simple white loaf or no-knead bread is the easiest place to start.
How do I get a crispy crust at home?
Add steam in the oven with a pan of water or a quick spritz.

Mariana is a passionate home cook who creates delicious, easy-to-follow recipes for busy people. From energizing breakfasts to satisfying dinners and indulgent desserts, her dishes are designed to fuel both your body and hustle.
When she’s not in the kitchen, she’s exploring new flavors and dreaming up her next recipe to share with the Foodie Hustle community.