
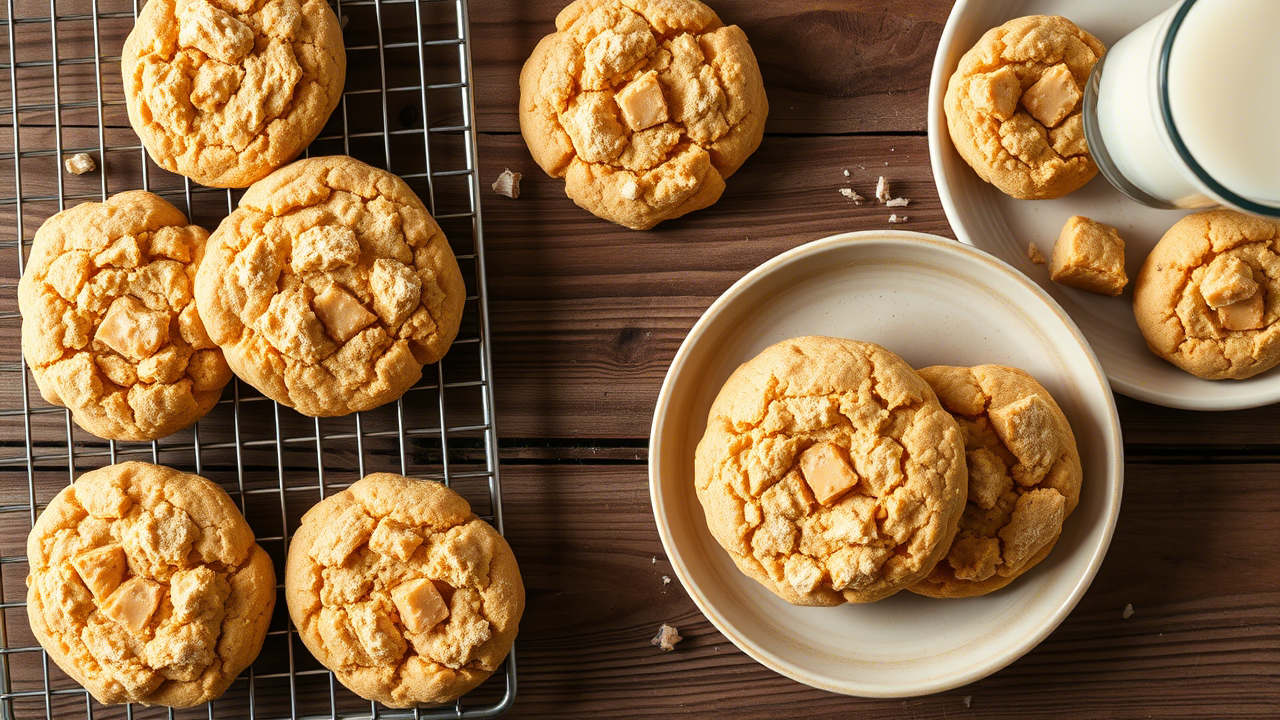
There’s something ridiculous, borderline offensive, about smashing a Butterfinger bar into a peanut butter cookie. And yet—done right—it’s alchemy. Crunchy, melty, sweet, salty. It’s a textural blitz. This isn’t your average cookie. It’s the kind you bake once, then start hoarding Butterfingers like some kind of sugar-addicted squirrel.
So why are these cookies worth obsessing over? Because they’re deceptive. They look like humble little drop cookies, but inside, they carry layers of flavor and contrast that can stump even seasoned pastry chefs.
Let’s unpack this ridiculous, genius cookie. We’ll get into the science, the process, the pitfalls, and even the psychology (yes, really) of what makes the Peanut Butter Butterfinger Cookie an underdog champion in modern baking.
The Peanut Butter Cookie: Classic, But Never Basic
Peanut butter cookies have been around since the 1910s. And let’s be honest, most of them suck. Dry. Crumbly. Too sweet or too bland. The issue? A lack of fat balance and flour-to-peanut ratio. People forget peanut butter’s not just flavor—it’s structure. Protein. Fat. Emulsifier.
When you build a dough around peanut butter, you gotta respect that it’s already acting like a shortening. So if you add too much butter? You get greasy puddle cookies. Not enough? They crumble like bad news.
Use creamy, shelf-stable peanut butter—yes, the supermarket kind. Skip the natural stuff. It’s too oily and inconsistent. Jif or Skippy. Trust me, this ain’t the moment for health food.
Now. Let’s talk candy.
Why Butterfingers Work (When Nothing Else Will)
Butterfinger’s not a normal candy bar. It’s weird. It flakes. It crunches. It melts into caramel shards when baked, yet holds a structure like toffee. You drop a chopped-up Snickers into a cookie, and it just goops. Butterfinger? It caramelizes into architectural marvels.
When baked into a dough, it does something nuts: It fuses with the peanut butter like it was always meant to be there. And that flakiness? It becomes a surprise crunch in every bite.
Use mini Butterfinger bars or fun-size, chopped roughly. You don’t want powder. You want uneven chunks—some melt, some don’t. That’s texture play. That’s why these cookies slap.

Ingredients Breakdown (Yes, Every One Matters)
Here’s what you actually need. Not the “fluff” version. Not the “just use what’s in your pantry” lie. We’re baking with precision here.
- 1/2 cup unsalted butter, room temp
Balance. This tames the peanut butter’s grip on the dough. - 1 cup creamy peanut butter (Jif preferred)
Fat, protein, flavor bomb. - 3/4 cup brown sugar (light or dark, both work)
Adds molasses depth. Helps chewiness. - 1/4 cup granulated sugar
Lends crispiness and caramelization. - 1 large egg + 1 yolk
Structure. The yolk gives chew. No, don’t skip the yolk. - 1 tsp vanilla extract
Always. It lifts the whole flavor profile. - 1/2 tsp baking soda + 1/2 tsp baking powder
The dual rise combo. Soda helps spread. Powder gives height. - 1/4 tsp kosher salt
Peanut butter’s already salty. This just sharpens the flavor. - 1 1/4 cup all-purpose flour
Sift it. We don’t want clumps. - 1 1/4 cups chopped Butterfinger bars
This ain’t optional. It’s the soul of the cookie.
Optional, but killer:
- 1/2 cup semi-sweet chocolate chips
Don’t go milk. Too sweet. And you already got enough sugar from the candy.
Mixing Method: Cream, Then Pulse
You don’t need a stand mixer, but if you got one, use it.
- Cream butter + peanut butter + sugars until light and fluffy. About 2–3 minutes. This aerates the base. You want it pale. Like, whipped frosting pale.
- Add in egg, yolk, vanilla. Mix just until incorporated. Don’t overdo it.
- In a separate bowl, whisk flour, soda, powder, salt. Dry mix. Crucial for even distribution.
- Slowly mix dry into wet, in batches. Go low-speed or by hand at this stage. It gets thick.
- Fold in chopped Butterfingers (and chocolate chips if using). Don’t overmix. You want streaks, you want chaos.
Now chill it. Yeah, I know. You wanna bake ‘em now. But don’t. Dough needs time to hydrate. Chill at least 2 hours. Overnight is better. You’ll get less spread, deeper flavor.
Shaping + Baking: The Golden Rule of Underdone
Preheat oven to 350°F (175°C). Line trays with parchment.
Scoop cookies using a medium cookie scoop or roll 1.5-inch balls. Spacing matters—they’ll spread. 2 inches apart minimum.
Bake for 9 to 11 minutes, but here’s the trick: pull them out while they still look raw in the center. The edges should just start to brown. Trust the carryover heat.
Let them cool on the tray for 10 mins. Then transfer. If you move too soon? They collapse like a failed soufflé.
Texture Science: Chewy Edge, Gooey Core, Crunch Surprise
It’s all about ratios and residual heat.
The peanut butter provides body. The Butterfinger melts partially, creating toffee veins. The egg yolk traps moisture. The sugars caramelize, giving edge crisp.
Bite in? You get resistance, then give. Then crunch. Then sticky candy melt. It’s absurd. It’s like biting into a memory and a mistake at the same time.

Storage + Freezing: Make a Double Batch. No, Really.
These cookies keep at room temp for up to 4 days, in an airtight container. But honestly? Freeze the dough balls.
Just pop ‘em onto a tray, freeze solid, then bag ‘em. Bake from frozen—add 2 more mins to the bake time.
Hot tip? Freeze with extra Butterfinger chunks pressed on top. That way they look bakery-level legit.
Troubleshooting: What Could Go Wrong (And How to Fix It)
- Too dry? Probably overbaked or used natural PB.
- Too greasy? Too much butter or not enough flour.
- Too sweet? Skip the chocolate chips next time.
- Butterfingers melted into goo? Chopped too small or oven was too hot.
Also. Humidity matters. If you’re baking in a damp climate, you might need a tablespoon less flour. Test one cookie. Always test one.
Expert Notes: Elevating the Base
Professional bakers? We mess with ratios like mad scientists.
Want a crispier edge? Sub in 1 tbsp corn syrup.
Want a cakier interior? Try cake flour for 1/4 of the total flour.
Want a flavor depth wallop? Brown the butter first. Chill it, then use it.
And here’s a weird flex: Add 1 tsp of instant coffee to the dough. It won’t taste like coffee—but it’ll make the chocolate and peanut butter pop like they got bass-boosted.
Real-World Use Case: Bakery-Tested, Crowd-Proven
I introduced these cookies at a pop-up in 2022. We sold out in under 90 minutes. People came back asking for the “crunchy chewy peanut butter thing with the mystery crackle.” They didn’t even know it was Butterfinger. That’s how integrated it becomes.
A local coffee shop started pairing them with cold brew. It’s been their top-selling bakery item since. You think it’s niche? It’s not. It’s the nostalgia hit nobody expects.
Common Questions
Can I use crunchy peanut butter?
You can. But it messes with consistency. Try adding crushed roasted peanuts instead.
Can I make these gluten-free?
Yes. Use a 1:1 GF baking flour mix. Make sure it includes xanthan gum.
Do I need to chill the dough?
Yes. Don’t fight me on this.
Final Thoughts: The Cookie You Didn’t Know You Needed
There’s no neat little bow to tie on this one. The Peanut Butter Butterfinger Cookie is messy. Loud. It doesn’t care about your clean-eating goals.
But it works—because every part of it is doing something.
It’s a masterclass in contrasts. Crunch and chew. Salt and sweet. Soft and crisp.
Bake it once, and you’ll understand.
Bake it twice? You’ll start hiding the Butterfingers in your sock drawer.

Mariana is a passionate home cook who creates delicious, easy-to-follow recipes for busy people. From energizing breakfasts to satisfying dinners and indulgent desserts, her dishes are designed to fuel both your body and hustle.
When she’s not in the kitchen, she’s exploring new flavors and dreaming up her next recipe to share with the Foodie Hustle community.